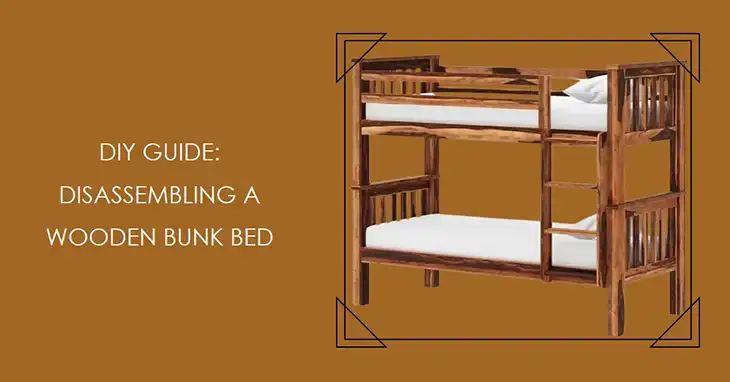
How to Disassemble a Wooden Bunk Bed?
Okay, so you’re staring at that old wooden bunk bed, and you’re like, “How the heck do I take this thing apart?” Don’t worry, I got you covered. Disassembling a bunk bed might seem intimidating, but with the right approach, it’s totally doable. First things first, you’ll need to gather your tools and clear the area. Then, we’ll tackle it step-by-step – starting with the ladder, then the top bunk, and finally, the bottom bunk. Trust me, if I can do it, anyone can. So, let’s roll up our sleeves and get this show on the road!
Gather Your Necessary Tools and Do Initial Works for Disassembling
Before you start disassembling the bunk bed, it’s essential to gather all the necessary tools and materials. Having the right equipment on hand will make the process smoother and safer. Here’s what you’ll need:
- Full set of Phillips head screwdrivers (sizes #0, #1, #2, #3)
- Full set of flathead screwdrivers (sizes 1/8″, 1/4″, 1/2″)
- Combination wrench set (sizes 1/4″ to 1″)
- Socket wrench set (1/4″ and 3/8″ drive, socket sizes 1/4″ to 3/4″)
- Cordless power drill with Phillips/flathead bit sett
- Utility knife
- Masking tape
- Assistant/helper
Once you have all the tools ready, it’s time to prepare the bunk bed for disassembly. Start by removing all the bedding, mattresses, and any items stored on or around the bed. This will give you a clear workspace and prevent any accidental damage.
Procedure for Disassembling a Wooden Bunk Bed
Now that you’ve gathered your tools and prepared the bunk bed, it’s time to start the disassembly process. Follow these steps carefully to ensure a smooth and safe dismantling:
Step 1 – Remove the Ladder First
If your bunk bed has a ladder attached, it’s best to remove it first. This will give you more room to work and prevent any potential accidents during the disassembly process.
- Locate the points where the ladder is attached to the bed frame, usually at the bottom and top of the ladder.
- Using the appropriate screwdriver or wrench size, remove the screws, bolts, or nuts that secure the ladder in place.
- If the ladder is also attached to the side rails or other parts of the bed frame, locate and remove those connections as well.
With the ladder detached, carefully set it aside in a safe location, leaning it against a wall or flat on the ground.
Step 2 – Now, Start with Removing Top Bunk Supports
The top bunk is typically the most challenging part of the disassembly process. It’s essential to have a helper to assist you with this step, as the top bunk components can be heavy and awkward to handle.
- Identify the support system: Locate the beams or brackets supporting the top bunk platform. These could be connected using screws, dowels, or a combination of both.
- Remove any screws or bolts: If screws or bolts secure the support beams or brackets, use your screwdriver or Allen wrench set to remove them carefully.
- Address dowel joints: Some bunk beds might utilize dowels for added stability. If you encounter dowels, gently tap them out using a hammer and a piece of scrap wood placed against the dowel to avoid damaging the frame.
- Disassemble the guardrails: Depending on the design, the top bunk might have detachable guardrails. If so, identify the screws or bolts holding them in place and remove them.
Throughout this step, communicate clearly with your helper and work together to lift and move the heavier components safely.
Step 3 – Remove the Lower Bunk
With the top bunk disassembled, you can now focus on the lower bunk. This part is usually less complex, but it’s still important to follow the proper steps.
- Repeat the process: Essentially, you’ll repeat the steps from removing the top bunk supports. Locate the screws, dowels (if applicable), and any other fasteners holding the lower bunk frame together, and disassemble them accordingly.
- Detach the mattress support slats: Once the main frame of the lower bunk is loose, remove the slats that support the mattress. These might be screwed or simply slotted into place.
Throughout the disassembly process, it’s crucial to keep track of all the hardware and components. Use the marker or tape to label each piece, so you know where it goes if you ever need to reassemble the bed.
Additionally, be cautious when handling the larger pieces of the bunk bed, such as the side rails and headboards. These components can be heavy and awkward to maneuver, so it’s best to have a helper assist you. Lift with your legs, not your back, and communicate clearly with your helper when moving or shifting the pieces.
Wrapping Up
Alright, you made it to the end! Give yourself a pat on the back because disassembling a wooden bunk bed is no joke. But hey, you did it like a pro. Remember, taking your time and being methodical is key to any DIY project. If you hit a snag or have any lingering questions, feel free to drop them in the comments below. I’m always happy to help out. And who knows, maybe your next big project will be reassembling that same bunk bed or tackling something even more ambitious. Whatever it is, you got this! Thanks for sticking with me, and here’s to many more successful DIY adventures!

