How to Separate a Metal Bunk Bed
Having a bunk bed is a great way to maximize space in a kid’s bedroom or dorm room. But as children grow older or living situations change, you may need to separate the bunk bed into two individual beds. While it may seem straightforward, disassembling a metal bunk bed requires careful planning and the right approach to avoid injury or damage.
This detailed guide will walk you through the process step-by-step to ensure you can separate your metal bunk bed safely and efficiently.

Before You Begin
Safety
Safety should be your top priority when disassembling a metal bunk bed. Always work with a helper to avoid potential injuries from lifting heavy or awkward parts. Clearing the work area and protecting the floor with a tarp or blankets is also essential to prevent scratches or damage.
Tools
Next, gather the necessary tools for the job. You’ll likely need a set of wrenches (adjustable and socket), screwdrivers (flathead and Phillips), pliers, and work gloves. Each tool serves a specific purpose, so ensure you have the right ones on hand before starting.
Gather Instructions
If you still have the manufacturer’s instructions, consult them for any specific disassembly steps or guidelines. These manuals often provide valuable insights, warranty information, and troubleshooting tips tailored to your particular bunk bed model.
Understand the Structure
Before diving into the disassembly process, take some time to examine the bunk bed’s frame and joints closely. Familiarize yourself with the key components and how they interconnect. This understanding will make it easier to identify potential pitfalls and navigate the disassembly process smoothly.
Disassembly Process
Step 1: Remove Everything
With the necessary preparations complete, it’s time to start disassembling the bunk bed. First, remove the mattress, pillows, and any bedding from the top bunk. If your bunk bed has a ladder or safety rails, detach them as well, following any specific instructions from the manufacturer.
Step 2: Find Connection Points
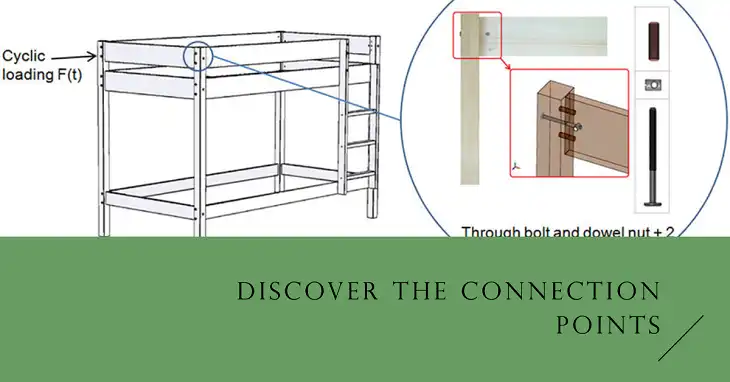
Next, locate the connection points between the top and bottom bunks. These may include bolts, screws, brackets, or pins, depending on the bunk bed’s design. Take pictures or make notes to help with reassembly later if needed.
Step 3: Remove the Hardware
Once you’ve identified the connections, carefully begin removing the hardware. If possible, consult visual aids like pictures or diagrams to guide you through the process. Close-up shots of the connection points and tools in action can be especially helpful.
If you encounter any rusted or stubborn fasteners, don’t force them. Instead, try using penetrating oil or a rust-dissolving solution to loosen them gently. Patience and the right techniques are key to avoiding damage or injury.
Step 4: Separate the Bunks
With the connections disassembled, it’s time to separate the bunks. Carefully lift the top bunk off the bottom bunk, ensuring you have a helper to distribute the weight evenly. Place the top bunk safely on the floor or a flat surface.
If your bunk bed has additional features like slats, headboards, or footboards, follow specific instructions from the manufacturer to disassemble them properly.
Completing the Separation
Once the bunks are separated, inspect each individual bed for any remaining hardware, sharp edges, or potential hazards. If necessary, add bed frame support or reinforcements to ensure stability and safety.
If any parts are missing or damaged, consider replacing them with new hardware to maintain the bed’s integrity.
If you don’t plan on reassembling the bunk bed immediately, organize and store the disassembled parts carefully. Label each component with tape or markers to make reassembly easier in the future. Store the parts in a dry, secure location to prevent damage or loss.
How to Convert a Metal Bunk Bed into Two Separate Beds

If you want to turn your separated metal bunk bed into two separate beds, there are some additional steps you need to follow.
Step 1: Assess the Bed Frames
Closely examine each individual bed frame after separating the bunk bed. Look for any areas that may be weak or unstable without the combined bunk structure. Pay special attention to the legs – if it’s a single long leg running the full length, you’ll need to cut it in half.
Step 2: Cut the Long Leg if Necessary
If your bed frame has a single continuous leg, carefully measure and mark the center point. Use a hacksaw or metal-cutting saw to cut through the leg, creating two separate leg pieces for the individual beds. File down any sharp edges.
Step 3: Reinforce Frame If Needed
For any parts of the frame that seem flimsy or unsupported, reinforce them accordingly. Adding metal braces, extra slats, or support legs in key areas can increase the stability of individual beds. Consult a hardware store for the right reinforcement materials.
Step 4: Obtain Headboards and Footboards
Measure the bed frames precisely and purchase new headboards and footboards if desired. Ensure the new pieces are compatible with your existing bed frame hardware for proper installation.
Step 5: Set Up Proper Mattress Support
Determine if you need a new box spring, bunkie board, or extra slats for adequate mattress support based on your mattress type. You need to do it right if you want to prevent sagging.
Step 6: Install Headboards and Footboards
If you are using new sets, follow manufacturer instructions to install and secure them properly to the existing frames. Having an assistant is always helpful.
Step 7: Install Legs
For the legs, install new individual legs or casters where the single long leg was cut in half earlier. Adjustable leveling feet ensure both beds sit flat.
Step 8: Make Final Adjustments
With both beds assembled, inspect closely. Adjust leg heights, frame alignment, or supports as needed to ensure complete stability and safety before use. Test sturdiness.
Summary
Separating a metal bunk bed may seem daunting, but with the right approach and safety precautions, it can be a manageable task. By following the steps outlined in this guide, you’ll be able to disassemble your bunk bed safely and efficiently, while minimizing the risk of injury or damage.
Remember, patience and attention to detail are key when disassembling a metal bunk bed. Take your time, follow the instructions carefully, and don’t hesitate to seek help if you encounter any difficulties along the way.
Frequently Asked Questions
How long does it take to disassemble a metal bunk bed?
The time required can vary depending on the bunk bed’s design and your experience level. Generally, expect the process to take 1-2 hours with the help of an assistant.
Is it safe to disassemble a bunk bed alone?
While it’s possible to do it alone, it’s not recommended due to the weight and awkwardness of the parts. Having a helper significantly reduces the risk of injury or damage.
What should I do if I can’t find the manufacturer’s instructions?
Look for online resources, such as instructional videos or forums, that may provide guidance specific to your bunk bed model. If unavailable, follow general disassembly principles and proceed with caution.